Surprisingly, many people do not know how to properly set a table. Who would have thought?! I guess the age of Emily Post is sadly over, ugh! Now we know you, yourself, may not necessarily be placing your china and silverware out for your reception, at least we hope you’re not!
Here is the 101 run down on how to properly set your tables and some extra advice from the wonderful Emily Post, herself.
Okay, the very first step you will want to take when deciding your table setting is, choosing your menu…probably the hardest decision EVER (at least it would be for me)! Why start with this step? Hmmm…I’ll take it straight from the mouth of Emily Post, “You should never have more china or silverware than what is needed.” With this being said, basically choose your menu first, and then you can properly decide exactly what & how many of each utensils and china should be set out for each guest. Your catering and rental company will be a huge help with this. Another reason to get those two particular vendors.
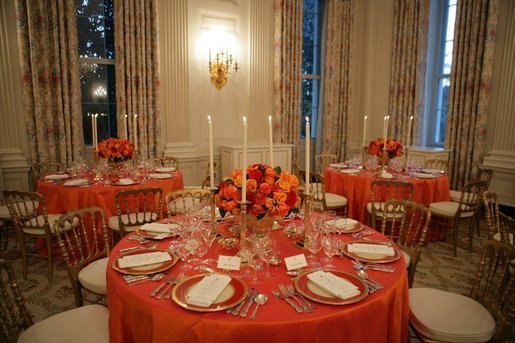
Let’s move on to the rules of table settings, shall we? The one rule for a formal table is for everything to be geometrically spaced. The centerpiece at the exact center, the place settings at equal distances, and the utensils balanced equally. Beyond these placements, you can vary flower arrangements and decorations as you like.
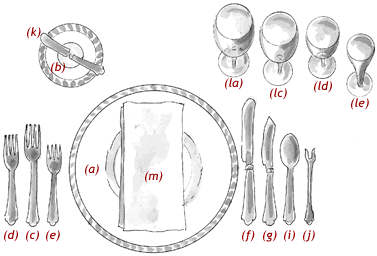
Okay, so the chart above is basically the most formal setting you could possibly have. So if this is what you decide to go with, make sure you think about the size tables you decide to get. The smaller the table in this case, the less people you can sit at one because of how wide your table setting will be. Also, size plays a huge part. If you get a 16 inch round, you won’t be able to fit as much as you would with the same size of a rectangle table. But, if you choose a simple traditional setting, you could fit a few more people at a smaller table. This really decides on the size of your guest list.
Going back to the first tip, of picking out your menu first, the placement of utensils is guided by the menu. The idea being that you use utensils in the famous ‘outside-in’ order. The menu for the setting above is in the order of:
- Appetizer: Shellfish
- First Course: Soup or fruit
- Fish Course
- Entree
- Salad
Let’s break the setting down, Emily Post style. Ready for this?
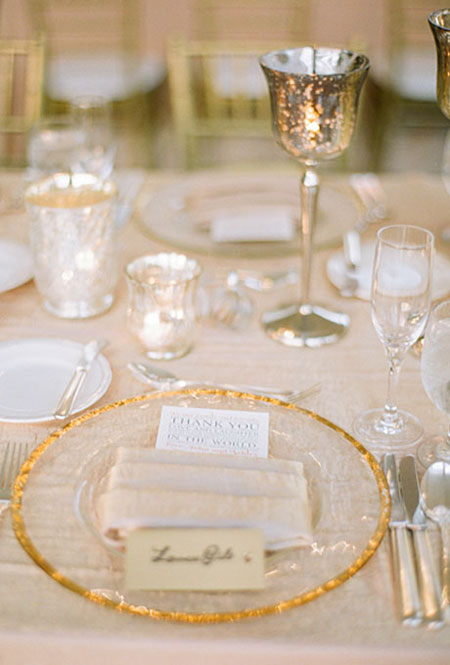
(a) Service Plate: This large plate, also called a charger, serves as an under-plate for the dish holding the first course, which will be brought to the table. When the first course is cleared, the service plate remains until the plate holding the entree is served, at which point the two plates are exchanged. The charger may serve as the under-plate for several courses which precede the entree.
(b) Butter Plate: The small butter plate is placed above the forks at the left of the place setting.
(c) Dinner Fork: The largest of the forks, also called the place fork, is placed on the left of the plate. Other smaller forks for other courses are arranged to the left or right of the dinner fork, according to when they will be used.
(d) Fish Fork: If there is a fish course, this small fork is placed to the left of the dinner fork because it is the first fork used.
(e) Salad Fork: If the salad is served after the entree, the small salad fork is placed to the right of the dinner fork, next to the plate. If the salad is to be served first, and fish second, then the forks would be arranged (left to right): salad fork, fish fork, dinner fork.
(f) Dinner Knife: The large dinner knife is placed to the right of the dinner plate.
(g) Fish Knife: The specially shaped fish knife goes to the right of the dinner knife.
(h) Salad Knife (Note: there is no salad knife in the illustration): If used, according to the above menu, it would be placed to the left of the dinner knife, next to the dinner plate. If the salad is to be served first, and fish second, then the knives would be arranged (left to right): dinner knife, fish knife, salad knife.
(i) Soup Spoon or Fruit Spoon: If soup or fruit is served as a first course, then the accompanying spoon goes to the right of the knives.
(j) Oyster Fork: If shellfish are to be served, the oyster fork goes to the right of the spoons. Note: It is the only fork ever placed on the right of the plate.
(k) Butter Knife: The small spreader is paced diagonally on top of the butter plate, handle on the right and blade down.
(l) Glasses: These can number up to five and are placed so that the smaller ones are up front. The water goblet (la) is placed directly above the knives. Just to the right are placed a red (lc) or white (ld) wine glass. A sherry glass, or champagne flute, to accompany a first course or for an opening toast, go to the right of the wine glasses (le).
(m) Napkin: The napkin is placed on top of the charger (if one is used) or in the space for the plate. It can also go to the left of the forks, or under the forks if space is tight.
We hope you enjoyed this post about etiquette for your wedding! We would love to hear your feedback or any requests you have for blog ideas. Please send inquires to studiowednashville@gmail.com
Happy Tuesday!
-Meta Lake


